Trying Out Things 3
• 10 min read
I'm always on the search for the best to-do list app and I've been pretty happy with Todoist since 2015 as a premium member. Their input and date recognition are the best, and they are always adding and updating features. What's not to like, right?
Well, recently I've just grown tired of the look. There is nothing wrong with the look, I'm just tired of it.
Enter Things 3
Things 3 is gorgeous, and it's a native Mac app, so a few years back, I purchased it from Cultured Code for all of my devices on a whim 🤦♂️.
But after trying it out for a few days I wasn't 100% sold on the to-do entry mechanism or their repeating feature, so I never made the switch from Todoist.
If I'm being honest, I've always felt like I wasted my money on the Things 3 purchase and that's why I'm giving the app a real chance this time and I'm hoping it sticks.
The Problem
I often use Todoist as a read-it-later service, so I have a lot of to-dos that need to be moved over to Things 3.
To move over these to-dos correctly, I've have a hurdles to overcome...
Since I enter most of the read-it-later to-dos via the iOS share sheet, the to-do name in Todoist is actually a link in the Markdown link format like below.
Todoist To-do Item With Clickable Link:
[To-do Name](https://website.com)
This looks nice, and also opens the url when you click the to-do name.
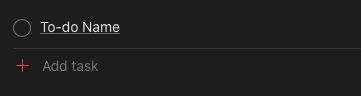
If I copy and paste this over in Things 3 it looks crappy.

The better looking way is to put the to-do name first (less the brackets) and then put the url link (less the parentheses) in the notes.
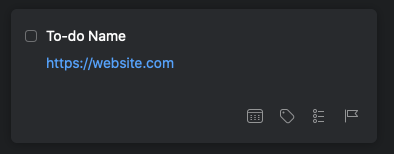
But this way would require a lots of copying and pasting, would be prone to error, and would be a complete pain to do for over 100 items.
The Solution
Now, I could probably hack something together using the Mac Swiss Army knife Keyboard Maestro, but I know that Todoist has an awesome Python API Library and Things 3 has great support for URL Schemes so I should be able to whip something up with Python.
Getting Setup
First, I'll create a new folder for this project and create a virtual environment to work in.
$ mkdir todoist-grabber
$ cd todoist-grabber
$ python3 -m venv venv
Now, I can activate my new virtual environment.
$ source venv/bin/activate
If you are new to Python Virtual Environments, you can learn more about them here.
Lastly, I'll create a Python file to hold my code.
$ touch app.py
Todoist API Token
Now I'll need to find my Todoist User API Token which is located in the Todoist app under Settings > Integrations.
I'll save my token as an environment variable in the terminal.
$ export TODOIST_KEY=abunchofgibberish0123456789
Saving environment variables this way is only temporary. As soon as you deactivate your virtual environment, they are lost.
An easier option is to use python-dotenv.
$ pip install python-dotenv
Then, I can load my Todoist API Token into a new '.env' file.
$ echo "TODOIST_KEY=abunchofgibberish0123456789" > .env
Now, whenever I activate the virtual environment for this project my Todoist API Token will automatically be loaded into the environment and accessible in my app.
Todoist Python API library
Doist, the company behind the Todoist app has an official Python API Library. I can install the package using pip.
$ pip install todoist-python
This module will make it easier to interact with the Todoist API, saving me time and effort.
The Code
I'll start off using the Python Interpreter to make sure everything is working correctly with the Todoist API.
>>> import os
>>> from dotenv import load_dotenv
>>> from todoist.api import TodoistAPI
Now that I have everything imported, I'm going to try and get my Todoist token from the environment variable I set earlier.
Next, I need to instantiate python-dotenv to load the environment variables I have setup.
>>> load_dotenv()
Then I can set the variable 'api_key' to my Todoist token.
>>> api_key = os.environ["TODOIST_KEY"]
And, to test out the connection, I'll print the name associated with my token.
>>> api = TodoistAPI(api_key)
>>> api.sync()
>>> print(api.state["user"]["full_name"])
Josh D.
Hey, that's me!
Since this is working, I'll put what I have so far into app.py and start trying to extract my to-dos.
Getting Every To-do from Todoist
I have a lot of to-dos in Todoist, so I'm going to make a function that grabs them all and then stores them in the variable 'todoist_tasks'.
def get_all_tasks():
    return api.state["items"]

todoist_tasks = get_all_tasks()
This way, I don't have to keep reaching out to the API and wasting resources.
My Todoist Projects
Since, I'm only interested in the to-dos inside of my "Review" project, I need to grab all of my projects...
def get_all_projects():
    return api.state["projects"]

todoist_projects = get_all_projects()
And then present a list to pick from...
def pick_project(todoist_projects):
    projects = []
    print("todoist projects")
    for n, project in enumerate(todoist_projects):
        project_name = project["name"].encode(
            "ascii", "ignore").decode("ascii")  # remove emojis
        project_id = project["id"]
        projects.append(project_id)
        print(f"{n + 1}: {project_name}")
    project = int(input("which project id? "))
    return projects[project - 1]

todoist_project = pick_project(todoist_projects)
I'll need this todoist_project variable later as it's the 'id' I will use to find the correct to-dos to move over to Things #.
Finding My Read Later To-dos
This next function will iterate over all of my to-dos and only grab the ones from the "Review" project.
def find_tasks(todoist_tasks, todoist_project):
    tasks = []
    for task in todoist_tasks:
        if task.data["project_id"] == todoist_project:
            content = task.data["content"]
            when = task.data["due"]["date"] if task.data["due"] else ""
            creation_date = task.data["date_added"]
            # if markdown link task then separate out
            if content[0] == "[" and content[-1] == ")":
                title = content.split("](")[0][1:].strip()
                notes = content.split("](")[1][:-1].strip()
            else:
                title = content
                notes = ""
            tasks.append({"title": title, "notes": notes,
                            "when": when, "creation_date": creation_date})
    return tasks

things_tasks = find_tasks(todoist_tasks, todoist_project)
When the function finds a to-do from the "Review" project, it will save the to-do information I need as a dictionary to the list 'tasks'.
Before, appends to the tasks list, the function checks to see if the to-do includes one of the Markdown links I described earlier.
Basically, if the to-do 'content' starts with an opening bracket '[' and ends with a closing parenthesis ')', it's a Markdown link for the purposes of this program.
if content[0] == "[" and content[-1] == ")":
    title = content.split("](")[0][1:].strip()
    notes = content.split("](")[1][:-1].strip()
else:
    title = content
    notes = ""
If the function finds a match for that pattern, it splits the string at the '](' and takes the two parts, title and notes (url).
Things 3 URL Schemes
Now, that I have all of the to-dos that need to be moved, I can use URL Schemes to send the information to Things 3.
To "visit" these special urls, I'll make use of Python's Web-browser controller which will need to be imported into my app.
import webbrowser
Building the Urls
Cultured Code has an awesome URL Scheme Link Builder on it's website. This makes it really easy to figure out the exact url I'll need to create each to-do in Things 3.
Using their Link Builder, I created placeholders for everything I would need to enter and ended up with this url.
things:///add?title=title¬es=notes&when=when&tags=tags&list=list_title&creation-date=creation_date
And with the magic of Python 3's f-Strings I can easily make a custom url for each to-do, I'll just need to have each variable with the curly braces '{}' defined.
f"things:///add?title={title}¬es={notes}&when={when}&tags={tags}&list={list_title}&creation-date={creation_date}"
You can leave the value for a placeholder variable blank if it's not needed for a specific to-do.
Covering my A$$
Before I import 100+ to-dos, maybe I should make it easy to find the imported to-dos just in case something goes wrong.
So, I plan to create a new project in Things 3 to hold all of the imported to-dos, which should make them easier to find.
Using the same Link Builder from above, I was able to create this url.
things:///add-project?title=things_project&reveal=true
Visiting this url will create a new project in Things 3 and then reveal that project in the app.
def make_project():
    things_project = f"IMPORT {datetime.now().strftime('%m-%y %X')}"
    purl = f"things:///add-project?title={things_project}&reveal=true"
    webbrowser.open(purl)
    return things_project
As you can see, this function does use the datetime module so I added that to the top of my app.py file.
from datetime import datetime
Next, the function creates the Things 3 url using f-Strings again and visits the url using the webbrowser.open(purl).
The last line returns the name of the new project so that I can use that value when adding my to-dos.
Adding To-dos to Things 3
I have everything in place, now I just need to make a function that creates a custom url for each to-do that needs to be moved.
def add_to_things(things_tasks):
# create a new project/list to hold the imported tasks
list_title = make_project()
# tags must already exist, comma separated
tags = "todoist"
for task in things_tasks:
title = task["title"]
notes = task["notes"]
when = task["when"]
creation_date = task["creation_date"]
print(f"...moving {title[:30]}...")
turl = f"things:///add?title={title}¬es={notes}&when={when}&tags={tags}&list={list_title}&creation-date={creation_date}"
webbrowser.open(turl)
print(f"tasks moved to things. find them in project {list_title}")
First, I'll call the make_project() function to create and open a new project in Things 3.
Next, I can set whatever tags (must already exist in Things 3) I want to applied to the imported to-dos.
Now the fun starts!
The function iterates over my list of to-dos, grabbing all of the values I need from the dictionary in the things_tasks list to create a custom Things 3 url.
Once, the url is formatted. I visit it using webbrowser.open(turl) and things happen fast.
As you can see, all of the to-dos come flooding in to my new project. Success!
Cleaning Up
Now, I just need to clean up my code and add the if name == main clause so I can use this standalone or on import if need be.
if __name__ == "__main__":
    todoist_tasks = get_all_tasks()
    todoist_projects = get_all_projects()
    todoist_project = pick_project(todoist_projects)
    things_tasks = find_tasks(todoist_tasks, todoist_project)
    print(f"found {len(things_tasks)} matching tasks...")
    cont = input("continue? (y/n) ")
    if cont.lower() != "y":
        print("no tasks were moved.")
        exit()
    else:
        print("starting to move your tasks...")
        add_to_things(things_tasks)
Category: development
Tags:
automation,
mac,
productivity,
python